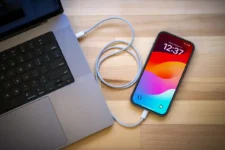
Upgrading to the new iPhone 17 is exciting—the faster performance, new features, and sleek design make the switch worthwhile. But before you can enjoy your device, you’ll want all your data—photos, contacts, messages, apps, and settings—moved over seamlessly. Thankfully, Apple makes the transfer process simple.
Here’s a detailed guide on how to move everything to your new iPhone 17 in four easy steps.
Step 1: Back Up Your Old iPhone
Before you begin, make sure your old iPhone is fully backed up. You can choose either iCloud or computer backup:
- iCloud Backup
- Connect your old iPhone to Wi-Fi.
- Go to Settings > [Your Name] > iCloud > iCloud Backup.
- Tap Back Up Now and wait until the process finishes.
- Confirm the backup was completed under “Last Successful Backup.”
- Computer Backup (Mac or PC)
- Connect your iPhone using a cable.
- On a Mac with macOS Catalina or later, open Finder. On earlier macOS or Windows, open iTunes.
- Select your iPhone and choose Back Up Now.
- For added security, select Encrypt Local Backup to include saved passwords and Health data.
? Tip: A fresh backup ensures nothing important is left behind.
Step 2: Turn On Your New iPhone 17
- Power up your iPhone 17 and place it next to your old device.
- You’ll see the Quick Start screen appear on your old iPhone, offering to set up the new device.
- Use your Apple ID to begin the setup.
With Quick Start, your iPhone 17 automatically copies over your Apple ID settings, Wi-Fi details, and preferences.
Step 3: Choose Your Transfer Method
At this stage, you have three ways to move your data. Select the one that best suits you:
- iPhone-to-iPhone Transfer (Quick Start)
- Simply hold the two devices near each other.
- Follow the onscreen prompts, then use your old iPhone’s camera to scan the animation on the new iPhone 17.
- Data begins transferring directly—no cables, no computer needed.
- Restore from iCloud Backup
- On your iPhone 17, select Restore from iCloud Backup during setup.
- Sign in with your Apple ID and pick the most recent backup.
- Wait for apps, messages, and media to download over Wi-Fi.
- Restore from Computer Backup
- Connect your iPhone 17 to your Mac or PC.
- Open Finder (or iTunes), select your new device, and click Restore Backup.
- Choose the latest backup and wait for the transfer to complete.
? Tip: The direct iPhone-to-iPhone transfer is the fastest if both devices are nearby.
Step 4: Finish Setup on iPhone 17
- Once the transfer completes, follow the remaining prompts to finish setup.
- Re-enter your Apple ID password and sign in to iCloud.
- If you used encrypted backups, your Wi-Fi passwords, Health data, and other sensitive information will already be restored.
- Open the App Store to confirm your apps are re-downloaded.
- Finally, check Photos, Messages, and Contacts to ensure everything came through.
? Tip: Some apps may need you to log in again (like banking or social media apps).
Final Thoughts
Switching to your new iPhone 17 doesn’t have to be stressful. With Apple’s streamlined transfer process, you can carry over all your important data—contacts, photos, apps, and even your custom settings—in just four steps. Whether you use iCloud, a direct iPhone-to-iPhone transfer, or a computer backup, you’ll be ready to enjoy your iPhone 17 in minutes.
Now that everything’s set up, it’s time to explore the powerful features, stunning camera system, and upgraded performance your iPhone 17 has to offer.